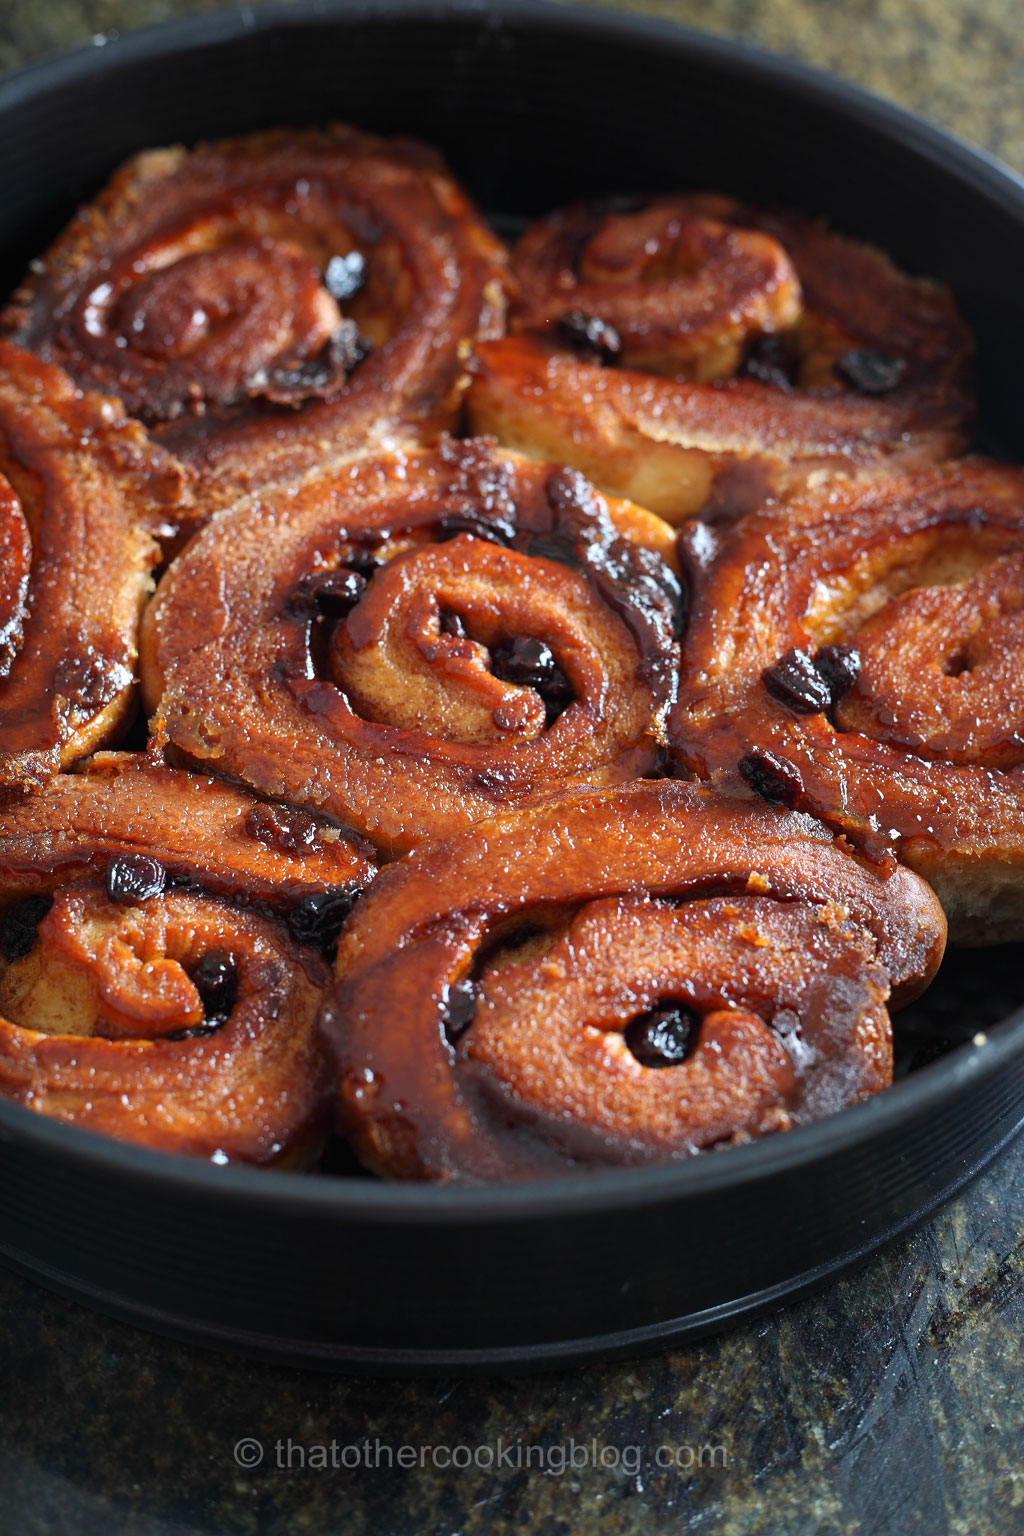
I don’t eat a lot of baked stuff but I love baking stuff. And if I had to choose what my favorite baked thing is, cinnamon rolls would go at the top of my list, well above croissants or … don’t hate me.. donuts… Palmiers are my all time favorite along with french bread, but cinnamon rolls are a close and firm second place, or is it third? whatever.
So, I gathered my notes and took some pics and wrote this post on how to make cinnamon rolls. They’re extremely easy to make, you can make them in a couple of hours from start to end and you will be met by excited coworkers and a victorious entrance ceremony when you arrive at the office carrying a tray full of these. You might not get a raise but what’s more important than the smiles of well fed colleagues during morning hours? exactly, nothing.
Ingredients (makes 12-14 rolls):
Dough:
500g AP flour
80g sugar (plus extra for dusting pans)
3g kosher salt
250g whole milk
112g unsalted butter (1 stick)
8g active yeast (1 packet) + 1 Tbsp sugar
2 whole eggs
Filling:
2 Tbsp ground cinnamon
1/2 cup brown sugar
1/2 cup raising (you can mix in pecans, walnuts, dry apple slices, etc)
50g unsalted butter (1/2 a stick)
1 or 2 Tbsp water
Icing:
1 Cup confectioner’s sugar
1 or 2 Tbsp whole milk
1 tsp Vanilla extract
Here’s how:
1. Make the dough. Place milk in a bowl and heat up in the microwave until lukewarm. Add the sugar and dissolve. Add the yeast and beat until yeast is incorporated. Let stand until a good layer of foam forms above the milk. This usually takes from 30 mins to 1 hour (depends on the temperature of your place, lots of scientific factors, divine interventions and such) Using a stand mixer, and this is probably the only way to finish everything in 2 hours or so… get all the dry ingredients in, and mix them well using the dough hook attachment. Scrape the walls of the bowl with a silicon spatula and mix some more to make sure all the dry ingredients are well mixed. I actually beat the eggs in my blender, before using to ensure they get evenly distributed. Cut the butter into cubes or slices and make sure it isn’t frozen. Room temperature would be ideal. Anyways, add the butter, eggs and milk (with the yeast) and mix at slow speed for a good 30 minutes to 45. Seems excessive but trust me, developing gluten in the presence of so much fat requires time. And we want these rolls to be mega chewy. The first few minutes will usually look like everything is going wrong in that mixer bowl… but after 15.. it starts to look like dough. In 20 minutes, it’s a wonderful sight. By min 30-45, the dough should start to slap the walls of the bowl signaling that it’s pretty much ready. Remove the bowl from the mixer. Detach hook. Cover the bowl with a kitchen towel, a pot lid, plastic wrap.. whatever you have, but cover it. Allow to rest for an hour. It should double in size.. again, if your place is too cold, this might require longer… 2 hours.. or longer.
2. Make the filling. Add all the ingredients into a pot over medium heat until a really thick dark and amazing syrup results. This will take about 10-15 mins of constant stirring. Don’t let the sugar burn, but a dark caramel is totally fine. If you don’t feel like doing this (which isn’t a standard in the cinnamon baking world) you can always just melt the butter and spread it over the rolled out dough and then sprinkle the sugar, cinnamon and raisins evenly over it skipping the addition of water. Allow the syrup to come to room temperature before using. If too hot, you will kill the yeast and the rolls might end up a bit denser than they should.
3. Roll the dough and add the filling. This step really doesn’t need much explaining. Just try to roll the dough in the shape of a rectangle, the length should twice the height of it. The pictures can do a better job at explaining this.
4. Bake away. Preheat the oven at 375F for about an hour. Meanwhile, get your other stuff ready. I use nonstick baking pans. If you don’t have one of those, then line a regular one with parchment paper. Sprinkle a layer of sugar over the pan. You can see in the pictures what I mean by this. Place the rolls on the pan spaced evenly leaving some room for expansion, just like in the picture. Bake for about 30 mins. I spray the oven with water, or splash some water on the bottom of it to release tons of steam. I do this 2/3 of the baking time into it. Helps with getting a more delicate crust on the rolls. Remove the rolls from the oven and allow to rest for a good half hour to an hour.
5. Make the Icing. While the rolls are baking. Add the sugar to the bowl of your stand mixer. Use the wire whip attachment. Add the milk. Beat until it looks like icing. Adjust the milk or the sugar amount until you get the right consistency. Should be fairly straight forward.
6. Apply the icing. Yeah, do it.
And that is basically it. Until next the next one!
Wanna get more sous-vide cooking guides and cool cooking how-to’s in your mailbox? You know what needs to be done!
We never spam. You should only be getting updates when new content is posted on the site. We also respect your privacy. We don’t share your email address with anyone and you can unsubscribe anytime!


21 comments
I sure wish you could mail these internationally 🙂
come visit!!!
Cinnamon rolls are quite popular around our house, especially on quiet Saturday mornings. Loved your photos…they made hope that a pan of these were baking in my oven. 😉
hahah! Thanks Allison!
These look incredible! Yum. I had no idea they were easy. I love your posts!
thanks Amanda!!!! 🙂 super easy!
Wow! These are fantastic. Lucky coworkers… Truly, this is a gorgeous post.
thank you so much! It was really fun to put together 🙂 I really enjoyed the photography aspect of it!
Looks great! I can imagine how wonderful your kitchen smelled. 🙂
Ronit! thanks so much! Yeah, the kitchen smelled incredible. I made the 2 days in a row actually. I took the photos on the second round.
Absolutely gorgeous 🙂
Beautiful recipe. Love the third photo!
🙂 !!!! thank you!!!
Oh yeah, that’s what I’m talkin bout lol. Delicious. Beautiful pics
hahaha, thanks!!!! I really love working on that particular post, baked goods photograph really well
That’s one of my favorite parts. I always pray to learn more lol. I’m ok, but YOU’RE really good. You must have an awesome camera. I have a Nikon, it’s fairly good but I’d say it’s middle range. Could get a better one down the road. Just bought this one about a couple months ago maybe.
Thank you Steph! I really appreciate that 🙂 I’ve been taking pics for a while and I do own a good camera these days. But my old DSRL, a 20D canon could do the same, and that’s a 9 year old camera. I own a 5D MarkII now. The trick seems to be finding good light and the lens on the camera and not the camera itself. If the lens is bad, the pic will be bad. I shoot mainly using a 50mm 1.4, not an expensive lens but super sharp. And I do all my photography with a canon speedlite flashgun. I shoot everything at night.
Haha, I’m surprised you do this at night. I have two different lenses but im a dummy in the Camera department. I know a couple little things but that’s it lol. You shoot indoors? I’ve heard in front a window with sunlight but I don’t have a good window, all mine have dark screens Over them lol. Been considering removing one haha
I do all my shooting indoors with no other lights, just my speedlite. I do get really nice sun light during the day, but I work during the day and cook dinners at home, and that’s what I usually photograph. Sunlight is ideal though. Wish I had more time at home! hahah Remove that dark screen, let the sunlight right in 🙂
btw, not sure you saw my post on phone food photography 🙂
http://thatothercookingblog.com/2015/06/28/5-tips-on-how-to-improve-your-phone-food-photography-now/
of course!