
I’ve been wanting to write about this topic for a long time. I frequently get asked about photography tips and how to get nicer pictures of food. Over the last few years I’ve found 5 areas that need to be understood in order to take a good photo (This is part 1 of my Food Phone Photography series, check the next one here). Specially a food photo. I’m working on a food styling post as well and can’t wait to finish that one, but food styling and plating without some basic photo skills is kinda pointless so I figured I’d start with this article.
 Another example of sunny window lighting, with the window behind the dish. There’s some tungsten contamination from some lightbulbs too terrible. Some post color editing done.
I will assume you don’t own any fancy gear (maybe you do and that’s cool too) and do most of your shooting using a phone camera (these tips apply to any digital photography). Phone photography is extremely popular these days and phone cameras have come a long way. I remember when they used to suck. These days, some amazing photography can be done with just a simple camera or a phone camera but to do so, understanding a few basic concepts of photography is indispensable. I’ll go over some basic stuff here that can easily be learned and applied right away!
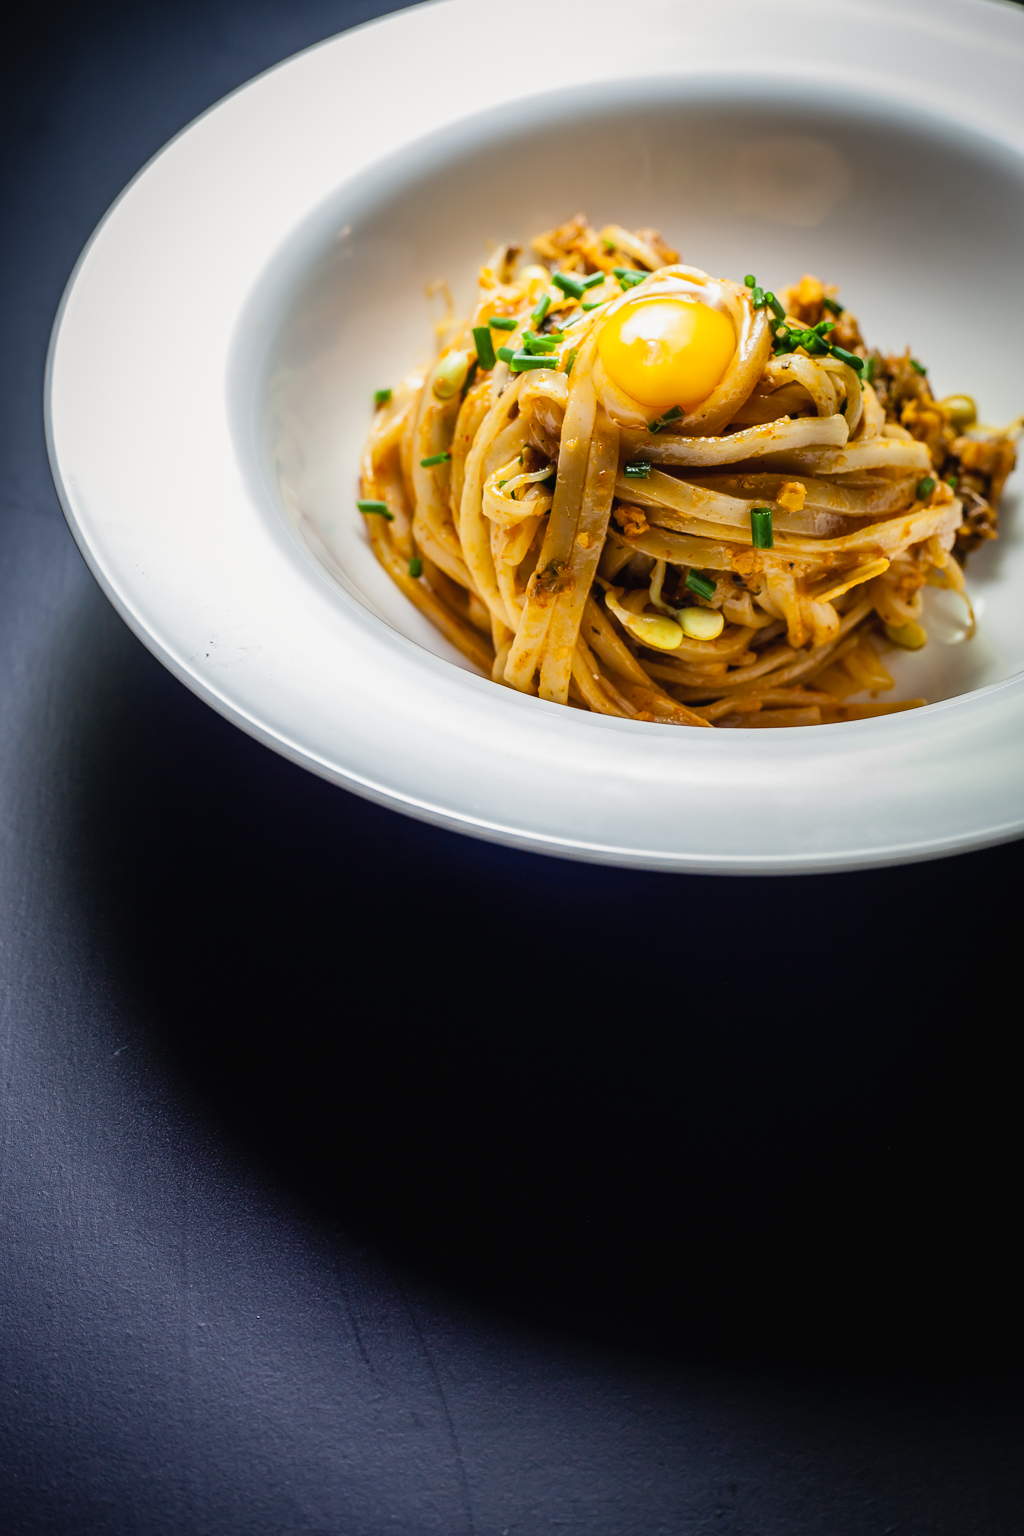
 top down shot, sunny window lighting, AWB, some basic color editing done
1. Make sure your white balance is right.
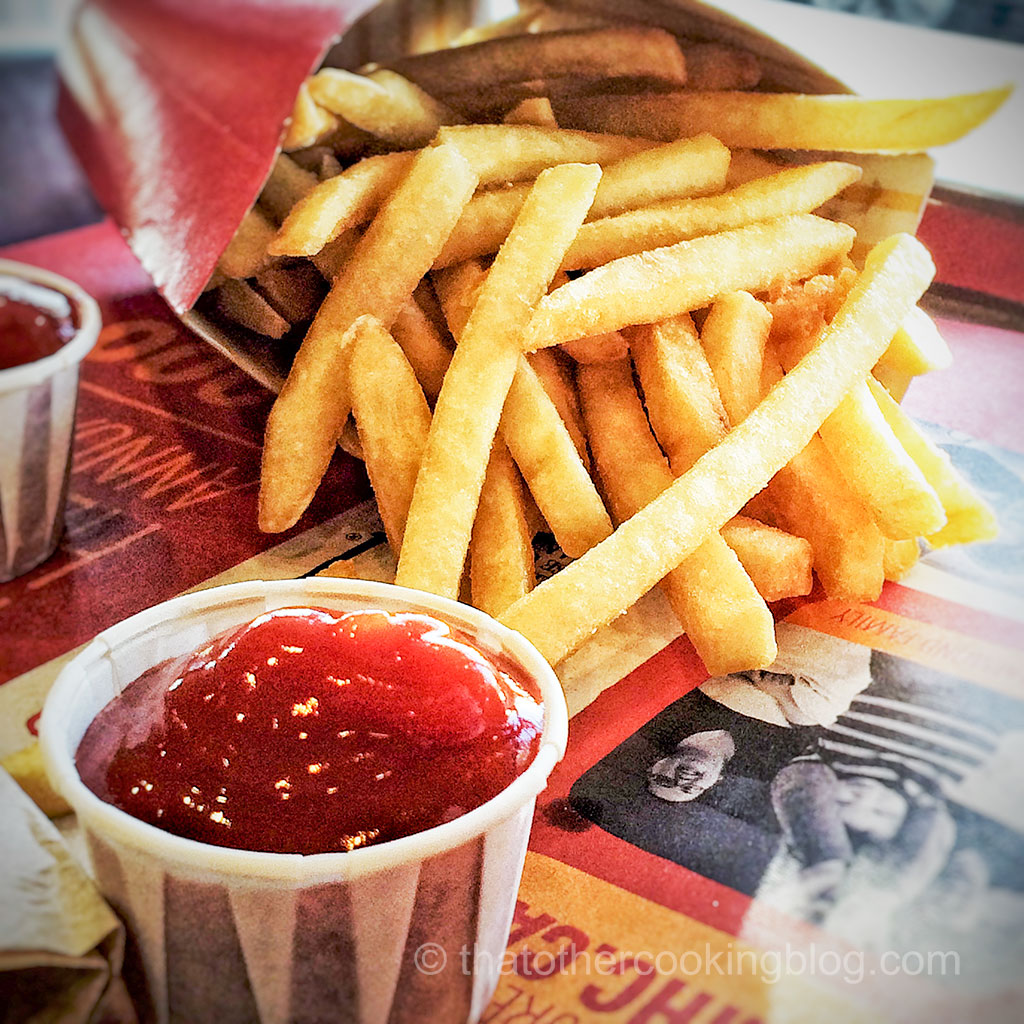
Incorrect white balance. This is probably the single most offensive thing I find in food photos (any kind of photo really) on food blogs and Instagram posts, including my own photos, specially when I look at my early stuff.

This is a pic I took a few of years ago. Horrible shot but I remember being very proud of it at the time, specially after applying some instagram filter. Nothing about it looks good to me now 🙂 Check out that yellowish tinting everywhere… BAD white balance and BAD everything really. Hey, maybe it was the style at the time 😉
What exactly is white balance and what makes it wrong? First, let’s talk about the color (temperature) of light. Not all light is white. Sun light at noon is probably the whitest source of light available to us. Even the sunlight color varies through the day which is pretty obvious when the sun is low on the horizon. Other sources of light also have a tint to them. A tungsten lightbulb isn’t white. It’s yellow even if our eyes perceive as white. Fluorescent light isn’t white either, it’s a bit green actually. Every light source type has a different tint to it.
White light is the ideal in photography (at least in basic photography) because white light renders true colors. Red will look red, blue will look blue, green will look green, and any combination of the 3 will look right.
If the light source isn’t white, photos will look tinted. In food photography this is a rather important thing to understand. It’s a lot easier to make food look appetizing when the colors of the food are truthful. Nobody likes a yellowish tinted photo of a medium rare steak. It doesn’t look good no matter how creative you wanna make it sound like. Sure, there are plenty of Instagram filters that can make anything look like the photo was taken 80 years ago and that’s sort of cool and stuff but I would hold off playing with filters like those before understanding some basic photography concepts.
 shot with tungsten WB in sunlight conditions, no corrections… horrifying.
Ok, so what is white balance. White balance is a process in which available light is made to appear more neutral and closer to white. The camera does that for us in most cases. Most if not all digital cameras have the ability to do this automatically. AWB or Auto White Balance. You’ve probably already familiar with it or have seen it somewhere. With this setting on, the camera will simply try to guess what’s the color of the light source(s) and try to neutralize it for us. In some situations this can be done. In others, it’s simply impossible and even fancy cameras can’t do it properly.
We won’t get into the details of how AWB is done because it gets super complicated real quick so I’ll keep it simple.
 regular AWB, a lot better
The fact that AWB isn’t that precise is the source of billions of crappy photos around the world. I blame bad lighting rather than bad AWB algorithms really. If you really wanna get into it, set AWB off and have fun experimenting, but you will soon switch it back on, takes too friggin’ long to get this setting ready and by the time you’re ready, your subject is gone. Food is a bit more forgiving, and some preplanning can save you time. Take some test shots of a white plate, adjust your white balance until the plate appears white in your camera’s LCD screen.
Selecting the incorrect white balance setting is the key to horrible photography.
Like I said, I rather find good light and let AWB do its job. Wrong white balance is basically this …. say, you took the pic on a sunny day but you had the tungsten WB setting on your camera… blue picture horror. Or you had the daylight setting on but you were taking a picture at night… yellow picture horror. Again, I suggest using AWB instead. AWB usually messes up when the light sources are mixed, say for example, you have some beautiful sun light coming through a window and some ugly tungsten lightbulbs in the room. What do to? AWB can get all confused by this. Sadly, mixed light sources in a scene is a pretty common thing. There’s basically no way to fix this without having to do some color correction at the end. I’d still suggest keeping the AWB on in this conditions and do some color editing afterwards. You can see some bluish and yellowish tinting happening at the same time on the picture above from my example. That’s because sunlight and tungsten light were working together. The AWB did a pretty decent job though.
 before and after : manual color correction of a photo taken with the wrong WB setting
If you like shooting food at restaurants and bars. Pick a location, if possible, somewhere where you would get just sunlight, or just tungsten lighting to make the white balancing job on your camera easier.
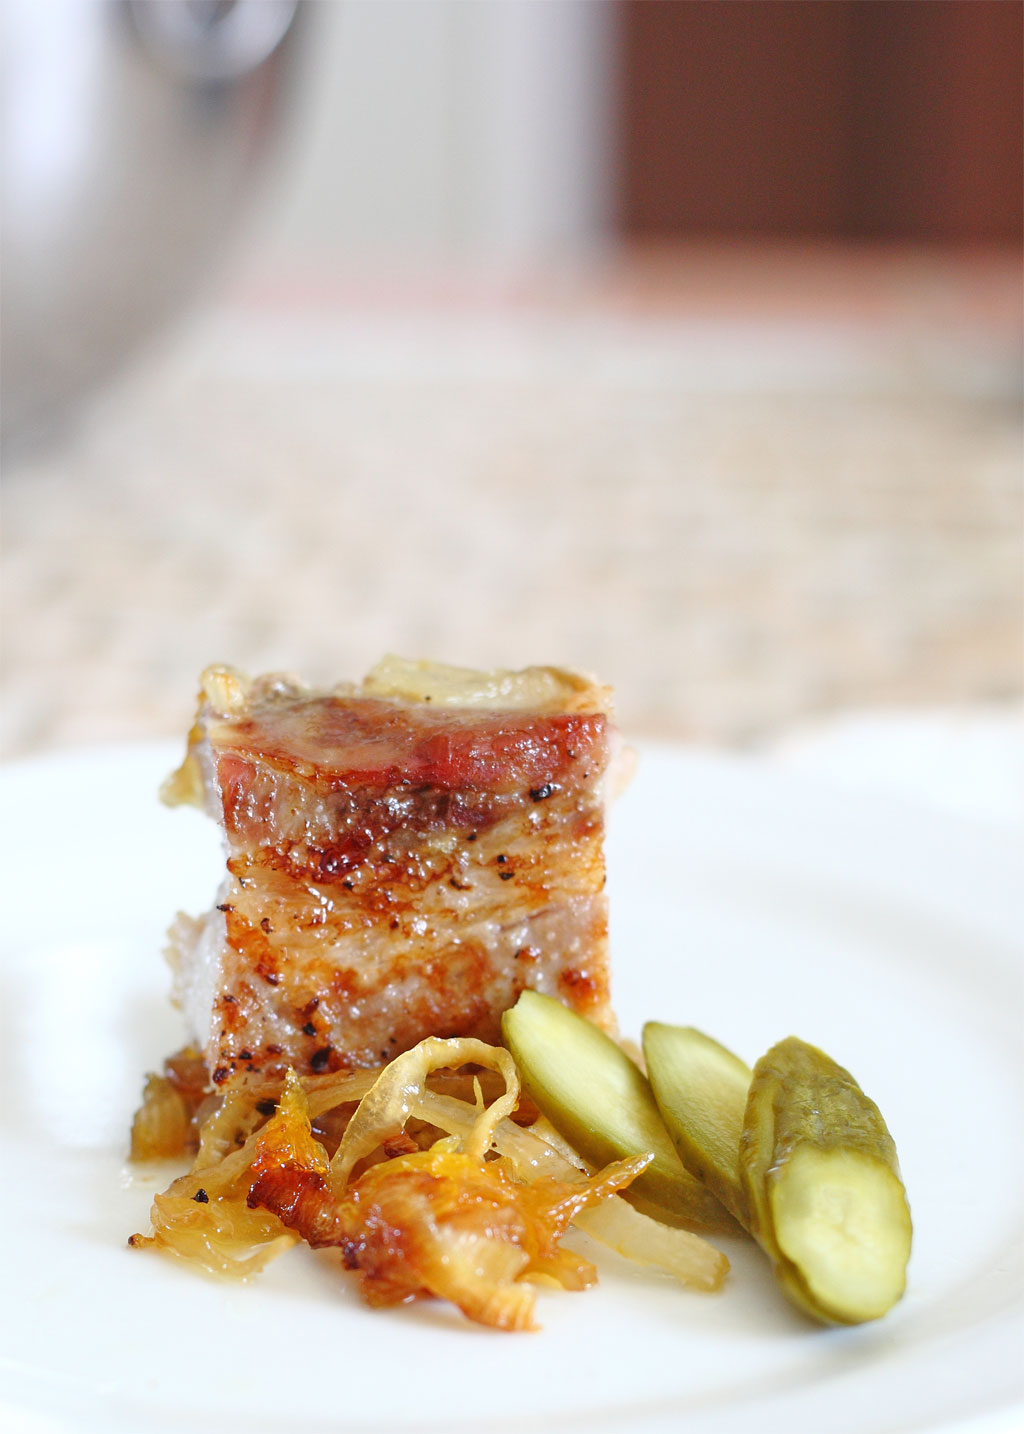
 shot with tungsten WB, but color corrected in post, not bad
What if you already took the picture and the white balance was wrong. Step off the ledge. We can still correct this to some degree. Simply do it as a post process. The iPhone 5s (that’s my phone at the moment) has a cast correction slider when you go into edit mode (top right corner). This is part of the photo software that ships with the phone so, no need to buy an app. Just slide the wheel sideways and get the white balance adjusted this way the best you can. I’m sure similar tools exist for any phone camera out there. Give it a try.

Adobe’s Photoshop and Lightroom have awesome white balancing tools (these are free apps for the phone btw), or you can get the computer software but it gets expensive. I am positive that good white balance can be achieved without any fanciness just by knowing your camera, your light, trying to avoid mixed light scenarios, and knowing the software on your phone. No more yellowish tinted pictures of food please. Food looks good with proper white balance in 99% of the cases unless the food looks like crap, nothing will fix that. Good white balancing is key for getting awesome pictures with your camera.
2. Turn off that phone camera flash please.
 shot with AWB, crappy shot but it can get worse…
It is off-putting to say the least. Unless you need to document something and there’s no available light, the flash on your camera should NEVER be used. I can’t stress this enough. Horrible pictures it’s all that thingy does well. When the camera flash light is used as a fill light is ok.. but that’s a bit more advanced and takes knowing other concepts so we won’t cover that in this article.
 much worse… shot with AWB and the evil flash, crap to the maxIf your food photos don’t look nice and you find yourself using the flash on your phone camera frequently… well.. I’d look into switching that thing off first thing before giving up on food photography or continue on taking crappy photos. Phone flash photography is a crime. Once you turn it off and start using available light to do the job, your photos will improve instantly. Add some good proper white balancing knowledge and you’re half way there!Most phone cameras default to having the flash go off whenever there’s not enough light in the scene for an adequate exposure. If there isn’t enough light, I simply rather not take the picture…seriously, turn that thing off and rely of more available light if you can. The more light, the less blurry, noisy and crappy the photo will be in the end anyways.
3. Use the sun whenever and wherever possible.
I already talked about this in the white balance and no-flash section but I’ll get into more detail here. Without fancy studio lighting, getting beautiful lighting on your food photos can easily be done by using sunlight. Let’s put it this way, the sun is the BEST light source for food photography. Specially for the phone photographer. Window lighting, like literally placing a plate of food by a window on a sunny day, works amazingly well.
 top down, AWB, flash fired… kill me please
Direct sun light looks good and if used well, can be striking and amazing but it can also be harsh. My favourite kind of lighting has to be indirect sun light coming through a window. This works every time (indirect means you shouldn’t see the sun from the window) . Try it out and while you’re at it move around your subject and take pics, you’ll probably find that if you’re perpendicular to the light direction (side lighting) the food will look amazing.
 top down, sun light through window, AWB, we’re back in the game
Also, if your food plate is between you and the window (backlit), amazing translucency and reflections will pop and render beautiful shots. Plenty of things to play with and you still haven’t bought any new gear, remember, just your phone camera and some basic concepts is all you need.
 eye level, perpendicular to window, indirect lighting AWB
 back lit, sun window, I really like this type of lighting. AWB
4. No blurry pics please.
I like sharp photos… like as sharp as humanly possible. The subject should be readable. Allowing the surroundings to go out of focus is fine but the subject in the picture needs to be sharp. Truth is, that’s a hard thing to do with a phone camera without a tripod. Specially in low light conditions because the camera will need more time to get the exposure of the picture correctly, and the longer the camera needs to take the shot, the easier our shaky hands will introduce blurriness.
 top down, AWB, shaky hands… can it get any worse? yes it can, try the wrong WB setting too
This is not where I tell you you need to go get a tripod and this or that… nah. If there’s enough light (certainly on sunny days), your photos should be fine by just holding the camera with your hands (use both hands if possible). When I take phone pictures of food, I like to find a steady support for my phone, like a glass (my phone once ended inside a glass… full of beer, happens..), or get my elbows anchored to the table, holding the phone with my 2 hands, or rest the phone on the table for low angle shots, etc… whenever I can, I will look for a way to steady up my phone and get a sharp picture. No more blurry pictures please. The world has seen enough of these already.
 Same settings as above, same shaky hands… I wouldn’t eat this, whatever it is….
Top down photos of food are super popular these days, that’s probably the one situation where unless you have enough light and a steady hand, the shot will come out blurry. It’s really hard to hold the camera steady in that situation. Make sure there’s enough light available before pulling this sort of stunt, you should be good then.
5. Crop and color correct your pics.
 original top down shot, window lighting, AWB. No editing done on this pic yet.
Unless the lighting conditions and the framing were perfect when you took the shot, chances are, you’ll need to do some post processing on your pics. Color correcting and cropping can be done inside the phone with its built-in software (at least most phones these days let you do this kind of stuff), and there’s plenty of free apps to do this as well.
Same photo, after cropping and some color editing.
I like to use snapseed for this purpose rather than the iPhone software, it’s an amazing little app and super fun to use. I do all my cropping and color editing there whenever I take phone photos. But what to do to a photo after you take it? go crazy if that’s what you like. I like to keep the editing to a minimum and focus on FIVE things.
a. I like to crop the photo for better composition.
b. I like to make the shot brighter.
c. I like to make the shot a bit more contrasty.
d. I like to make the colors a bit more saturated.
e. I like to sharpen the photo a bit.
That’s more or less all I ever want to do to a photo that I’ve taken with my phone. Some apps allow you to do fancier stuff, like adjust vibrance or structure, etc…these are more sophisticated ways of adjusting color and contrast, you can find those in different apps or photo editing software for the computer. I’d suggest exploring those after you feel comfortable doing the basic cropping and color editing I mention above. Getting into fancier editing techniques without understanding the basics will just confuse the hell out of everything.
Let’s wrap it up.
Taking photos of food is fun and even funner when your pics turn out awesome. By knowing a few things we can make our lives easier when trying to get a nice shot of a plated dish or anything in general really. I personally take a lot of shots and then sort through them and select only a few and then work on those, do all the cropping and color editing until I’m happy. I look at a lot of other people’s food photography for reference too. I steal ideas whenever I can. I spend some time trying to figure out the light direction, the quality of the light, the angle, the colors, the composition and hopefully some of that stuff will transfer into my own photography. There’s no way to magically take good photos of food. Tons of practice and knowing a few basic concepts will definitely make your food photography improve dramatically. Like starting right now.
 remember that beer story…
If you want to check out the next 8 tips on food phone photography, check my next article here! Have fun shooting!
Wanna get more sous-vide cooking guides and cool cooking how-to’s in your mailbox? You know what needs to be done!
We never spam. You should only be getting updates when new content is posted on the site. We also respect your privacy. We don’t share your email address with anyone and you can unsubscribe anytime!
13 comments
This is a great blog. I agree with you that there are many horrible food photo villains out there! Great tips 🙂
Thank you! Thanks for the follow too!! Love your photos
Thank you! Your blog is cool and I love taking pics of food! 🙂
Hey, great article, and well written! I apologise for all of the bad photos of mine that you’ve had to endure!! ha ha! 🙂
hahaha oh god, I’m sorry! that was a bit too aggressive wasn’t it?, but I included myself in that pool of bad photography, I’ve done years of it hahah, I hope that came across. It’s a learning process and we all gotta go through it, right? 🙂 Thank you for checking in Jacqui! Glad you liked the article!
Thanks Paul, This was one much awaited post for me 🙂
Thank u again for throwing some LIGHT on amateur photographers like me 🙂
You’re so welcome! And thank you so much for nice comment! if you have any questions let me know in the comment section please. I’m working on the food styling post, hopefully get to post it very soon!!
Reblogged this on PostDot.
Great post, Paul!
Thanks Patty!!! Glad to hear back from you 🙂
relink