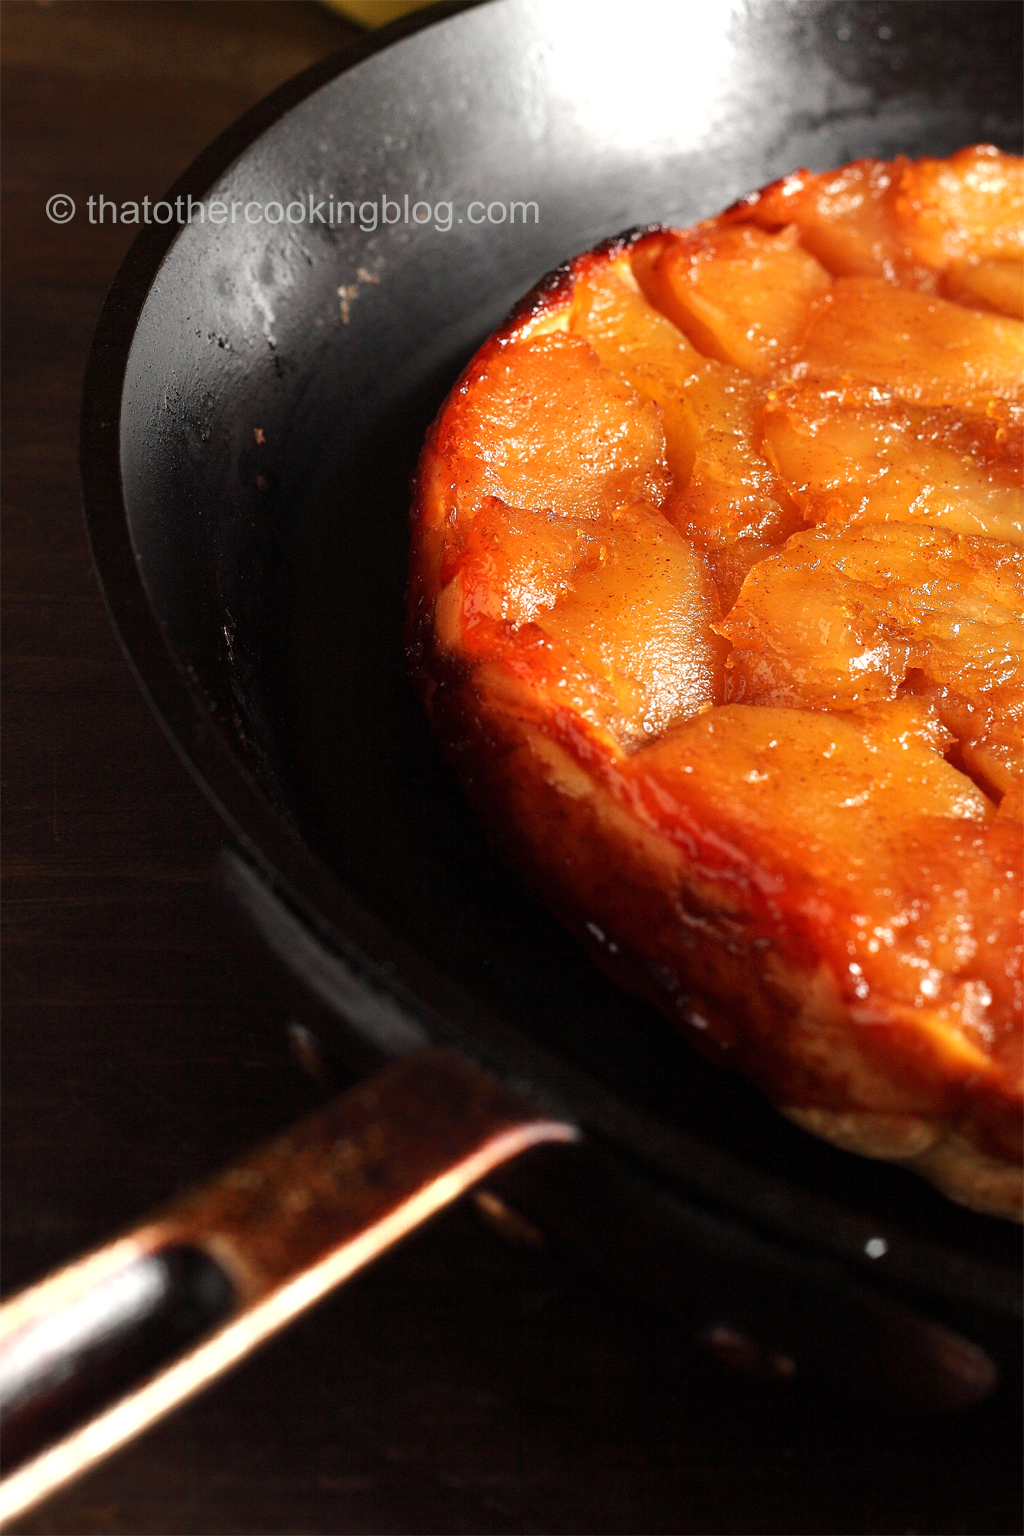
This classic upside-down apple french tart, although a bit challenging to make, it is extremely rewarding and perfect dessert for the upcoming holidays. Or if you’re like me, a perfect dessert period. Hope you won’t need the usual holiday-only-too-time-comsuming-I-need-motivation excuse to make it because it is really fun. It does take time, but you can definitely do it all in less than 3 hours including the home made puff pastry. If you buy your puff pastry at the store, then, this is a 45-60 minute deal really. I enjoy making my own puff pastry, for this pie, I made pate fuiletee rapide which is a short cut technique that is less tricky and offers wonderful results. Basically a folded pate brisee. It will be extremely buttery and flaky. My house still smells like a french pastry shop.

There are tart tatin recipes as there are cookbooks and blogs out there, so I decided to make the simplest version of it I could find. But simplicity, specially in cooking is usually a wonderful way to achieve fantastic results. If you’re into baking and just started exploring the great subject of french tarts, this is a great one to learn and many useful lessons can be learned from it. Here’s what I did:
Ingredients (makes a single 9-10 inch tart tatin):
Puff Pastry :
200g AP flour
112g unsalted frozen or very cold butter (a butter stick basically)
25-50g granulated sugar
3-4 Tbsp chilled water
1 or 2 pinches of kosher salt
Apples filling:
8 cored, peeled and quartered golden delicious apples
50g butter
100g sugar
1 tsp cinnamon

For the puff pastry. Using a food processor (you could totally do this by hand, but this time I employed the food processor) place flour, salt and sugar in the bowl. Pulse a few times to aerate and sift. Cut the butter into small 1/4 inch cubes with a knife over a cutting board, then add the butter cubes to the food processor. Pulse until flour is coated with the fat, and the cubes have become smaller in size, the size of a pea more or less. It’s ok if there are bigger chunks. If the butter is frozen, this process will take longer so be patient. Now that the flour has the look of corn meal, add the water, one Tbsp at a time, then pulse to incorporate. You might not need all the water, so test the dough between your fingers as you go. If you press some dough between your fingers and it comes together, you have enough water, if it still crumble, then keep going. Empty the bowl of your food processor on a clean surface and shape the dough into a ball. If the dough doesn’t come together you can return it to the food processor and add more water. Once the dough is shaped into a ball. Flatten into a disk of a bout an inch in thickness. Wrap in plastic and place in the fridge for about 30 minutes so the flour hydrates evenly and the little gluten that formed, relaxes as well so we can roll out the dough later.

To roll out the dough and fold it. Flour a flat working area, keep a pastry brush and more flour nearby, you’re gonna need to flour this dough through the process. Unwrap the dough disk and place it on the work area. Flour your rolling pin as well. Now, roll out the dough vertically away and towards you. Shape it with your fingers as you do this. What we want is a rectangle shape as close as you can get it. Once you have a nice rectangle of about 1/4 of an inch thick, fold it as you would a letter. Now you should have a nice folded rectangle in front of you. Rotate it 90 degrees and roll it out again into a rectangle of 1/4 of an inch thick, fold as done previously. Rotate one last time 90 degrees, roll out into a rectangle of 1/4 of an inch thick and fold one last time. You’re done. You will probably need to dust the work surface and the dough as you go, but brush off any excess flour on the dough. Wrap in plastic and place back in the fridge for another 30 minutes.

To make the apple filling. Add butter and sugar to a hot skillet on medium heat. Cook until butter is melted and sugar is starting to bubble. Add the apples and sprinkle the cinnamon over, and using a spatula mix them into the butter until coated. Cook for about 10 minutes, stirring occasionally. A light caramel will form and the apples will become soft and slightly darker. Remove from the heat and transfer to a buttered tart pan. It’s time to roll out the dough and give the apple a little time to cool off.

To roll out the final crust. Place the dough on a clean and floured surface. Using your hands, shape into a square box. Using your rolling pin, start flattening the dough, rotating 90 degrees every few passes to keep an even thickness and a more or less square shape. If the butter is too cold, this could be hard work. You can allow the dough to rest at room temperature a few minutes before you start. Roll to about a 1/8 of a inch thick. You should have a sheet of dough that’s larger than a 10 inch tart pan by 1 or 2 inches. Place dough over the pan. All you really need is about 1 inch of extra diameter so trim away the rest using scissors or a sharp knife. Tuck the edge of the dough inside the pan and over the apples. Remember, this is an upside tart, so shape the dough to form a tart shell for the apples.

To bake the pie. Before you add the tart to a preheated oven at 400F. Cut vents on the dough, a few (I made about 10-12 cuts) of about half an inch long. This will allow the water from the apples to escape. Otherwise, the crust will never cook properly. Place the pan in the oven for about 40 minutes. Checking to make sure the crust is perfectly golden. Remove from the oven. The tricky if not the trickiest step is flipping the tart upside down. You have to work while the pan is hot so the caramel doesn’t become too sticky and ruins your tart. You have to work carefully, protect your hands with dry kitchen towels or oven mittens (I prefer kitchen towels, better grip). Place a flat dish over the tart pan. Hold them together and flip them in one move. I also have a cutting board in place and slightly bang the dish once or twice against it to ensure that the tart has released, then carefully remove tart pan, and there should be a beautifully amber caramel covering the warm apples, all sitting in a flaky and buttery pie crust.

This pie takes practice to make, so don’t get discouraged if you don’t get it right the first few times. I won”t tell you how many I messed this up. You’re welcome to guess.. here’s a hint… MANY. I hope you find yourself considering some tart making in the near future if you weren’t already 🙂 Until the next time. Now I go clean the kitchen.
Wanna get more sous-vide cooking guides and cool cooking how-to’s in your mailbox? You know what needs to be done!
We never spam. You should only be getting updates when new content is posted on the site. We also respect your privacy. We don’t share your email address with anyone and you can unsubscribe anytime!


38 comments
Umm. Did you peal all those apples yourself??? Amazing!!!!
hahahahah, im getting faster and faster too 🙂
Your tart looks so delicious! It’s always nice to put work into making something and have it turn out beautiful 🙂
Ada, thank you! it’s indeed nice to put 3-4 hours of work into something and have it not be a disaster 🙂 it happens all the time.
Gorgeous! Tart Tatin is on my foodie bucket list. One day, when I have an oven, I’m going to learn to make this. I think the best thing about messing up these sorts of recipes is that you have to do it over and over again. Oh and you get to eat the evidence 🙂
Thanks Genie! yeah, practice is the only way to get some recipes right (or as right as possible haha) What happened to your oven? you never had one? say hi to Tofu.
Our oven died in January and our landlord replaced it with another faulty oven in April. Still waiting for a replacement. At least we have a stove. If I had to choose between oven or stove, I’d chose stove. you can’t have Tatin every day!
hahahah! 🙂 if you have a grill and a dutch oven, im sure you could figure something out 🙂 I just replaced my range (don’t sure what is called… both stove and oven in one appliance) because it was so sad looking after so much abuse over the years. I hope your landlord installs a really awesome one!
I really need to buy myself a skillet and finally give this a go! you’re incredibly talented!
ah thank you so much!!! how come you don’t have a skillet?? 🙂
Paul, you get top prize for this! Not only does that tarte tatin look stupendously scrumptious, but you made your own puff pastry! You da man! 🙂
Thanks Angie! I’m so glad you liked it! Ah puff pastry… Why do I torture myself like this? 🙂 hahaha it’s worth it though
Congrats on this success 🙂 looks great
Thank you Stefan! I was pretty happy with it 🙂 glad you like it!
Wow, Your Apple Tart Tatin looks marvelous! The thinness of the crust and the caramelized color is delectable.
So happy you liked the photos! Thank you! 🙂
Wow! Look at that color! Looks for so pretty and delicious! Pining your photos to my board now.
I am thinking to try this with the puff pastry that I have stored in my freezer for quite a while….
Thanks dan! Go for it, if you already have the puff pastry, should be a lot quicker, let me know how it goes!
Hi, I love your work, so I just nominated you for the Versatile Blog Award! The Rules are:
Display the award on your blog
Mention/link the person who nominated you
Nominate another 10 (or so) bloggers you feel should be given this award
Inform these individuals that you have nominated them
Write 7 facts about yourself
http://juditbakes.com/2013/11/15/2131/
Love, Judit
thank you Judit! this is super cool :)! I will get to work on my nomination post as soon as I can. Id like to pair it with a recipe or tutorial of some sort, so it will take me a bit to get to it. And congratulations on your nomination!
This has been on my to do list for a long time. This looks beautiful and inspiring!
thank you Petra! so glad you like it! Please, I know its a bit of work, but if you make it, let me know how it goes!
Beautiful as always 🙂
you super nice as always, thank you 🙂
Apple tart at its best 🙂 Warm, inviting tart to die for 🙂
And breath taking simple pictures.
Following you, dear.
Thank you Nusrat! I could stare at your photos all day long. They are so unique and beautiful.
You are a little too kind 🙂 Stay in touch please. I’m following you plus I’ve bookmarked your page so that I don’t miss a thing 🙂
will do 🙂 thank you!!!
Tarte Tatin is divine and yours looks like a real success! Beautiful photos – it’s one of my favourite desserts…
thank you! and thank you for following my blog 🙂 I had follow yours it looked so great!
Oh I LOVE tart tatin. And Mr H. being French had insisted I tried making it. All the recipes I saw insisted it be made within the same recipient, as in the same recipient on the stove and on the oven, which I don’t have. Plus my oven is quite tiny so something like that will be hard. I’ll think I’ll go by yours which lets you transfer the caramel and apples into a tart pan, yay! 🙂
yeah, they could be all made in the same recipient, Ive done it that way too, in my cast iron pan, and it works great too. You could also make mini ones, using ramekins if you have them, cooking the apples in the oven first, and then covering them with the puff pastry. Similar enough i guess 🙂
Looks amazing! Also, wondering what kind of camera you use? Your pictures are always so crisp and clean. I have been using my cell phone camera and am badly in need of an UPGRADE! lol
Hi Jess! and thank you! glad to hear from you again 🙂 To answer your question, I use a canon 5D mark II and have been mainly taking photos with a 1.8 50mm canon lens. I also use a speedlite 430 ex ii, and when not shooting flash, i have my camera on a gitzo tripod and a ball head. This setup might be a little pricey, but I’ve been doing photography for so many years, I’ve been slowly upgrading when I can. The most important pieces of gear you’ll ever own, a good tripod, and a good lens. The camera body isn’t really that critical, and I shoot flash because there’s not enough sun light in my apartment and I usually cook at night, so I dim all the lights and shoot in the dark 🙂 while cooking.. not safe, i know hahahah. If you wanna talk more about photography, let me know.. i can talk about it forever 🙂 … I shoot RAW format so I can post process everything and have absolute control.
I don’t have much light in my place either and I, too cook at night! So i can’t judge that at all! Haha. I don’t know much about any of this yet so it will be quite a learning curve for me but I’m excited to begin it! I have a couple of friends who have recommended canon to me so that is most likely the brand I will go with. My brother has also told me some about RAW formatting but I’m sure it will take me some time to get to that point! Thanks for the info! Once I get my camera I won’t hesitate to ask you if I have any food photography questions!
awesome! here is a good book that might be helpful.
http://www.amazon.com/Plate-Pixel-Digital-Photography-Styling/dp/0470932139
let me know when you get that new camera! this is exciting! 🙂
Thanks! This book looks excellent! It is very exciting!! I will let you know 🙂
reconnecting thoughts