Here we go… walking into unknown territory again… maybe not for you but certainly for me. My Vietnamese kitchen knowledge is literally zero or so it was until a few hours ago.
I love Vietnamese food and eat it frequently but I have never actually cooked a single Vietnamese dish at home, well, until tonight. Luckily I do own one Vietnamese cookbook (which by the way, I don’t remember buying… probably “borrowed it” from someone. Hush! ) which is the inspiration of today’s recipe.
I couldn’t find it on amazon, so my apologies for now proving a link. The book: The Food of Vietnam by Trieu Thi Choi and Marcel Isaac. Now that we’ve gotten over the accreditation part let us remind ourselves that here on the northern hemisphere it is pretty much mandatory stew-time, let us also remind ourselves that fear is not an option so without further ado, let’s get our “sousvidified” Bo Kho going! and here’s how:

Ingredients:
(makes 4 portions or just one if you feed it to me):
I got beef:
- 2 lb top round meat. cubed.
- 1 Tbsp of vegetable oil for searing the meat.
Annatto oil:
- 3 Tbsp of vegetable oil for the annatto oil.
- 2-3 Tbsp of annatto seeds.
Stock:
- 1 Tbsp of vegetable oil for sweating the veggies.
- 6 cloves of garlic. crushed.
- 2 medium shallots. roughly diced.
- Lemongrass stick. Thick bottom part only. Bruised. Remove outer layers.
- 1 1/2 tsp of salt.
- 1 Tbsp hoisin sauce.
- 1 Tbsp fish sauce. Red Boat brand if you ask me.
- 1 tsp curry powder.
- 2 Tbsp tomato paste.
- 1 Tbsp brown sugar.
- 3-star anise pods.
- 1 cinnamon stick.
- 400 grams or about 1 Cup and a 1/2 of water.
The Garnishes:
- 1 large carrot, sliced diagonally (to preserve traditions…)
- 1 lime, sliced and ready to squeeze.
- Thai basil, think Pho garnishes basically.
- Fresh cilantro.
And the noodles, which are totally optional until you try it.
- Rice stick Pho noodles … Three Ladies brand, XL size.

1. Mise en Place like there’s no tomorrow.
I’m very OCD but I consider that a good thing when it comes to cooking. My kitchen is usually clean before I even finish cooking.
For this recipe, given the amount of ingredient and the somewhat involved process, I actually prepped everything the day before cooking this time and it made a huge difference in the level of stress and anxiety. I portioned every ingredient, diced and measured everything, down to the water. The only thing I didn’t do was cubing the meat. I didn’t want to lose any moisture in the fridge overnight. A bit psychotic but I slept better. Anyways, if you can prep ahead, do it.

2. Sweat/pan roast the veggies.
This is actually pretty easy for this recipe. There are only 2 vegetables that need some skillet time. Garlic and shallots (or onion if you prefer). Use 1 Tbsp of oil in a skillet over medium-high heat. Start with the shallots and give them a nice golden roast. About 5 minutes. Don’t let them burn. Add the garlic and give the cloves a bit of color but be careful not to burn anything. Deglaze the pan if necessary. Add these veggies to the pressure cooker.

3. Pressure cook the stock.
Add all the stock ingredients to your pressure cooker or a stockpot. Pressure cook for 45 mins or cook regularly for 1 hour and a half. Release the pressure and strain the liquid. Discard the solids (you’ve extracted all they had to give in terms of flavor) Allow the stock to get to room temperature.
Note: Vacuum sealing hot liquids leads to a mess because water boils at much lower temperatures in the vacuum. So, either allow the stock to get to room temperature or chuck it in an ice water bath.

4. Sear the meat.
Add one Tbsp of oil to a skillet over high heat. Make sure the pan and the oil are above 400F. The oil should ripple and start to smoke or if you don’t want to trust your senses get an infrared thermometer which is a super fun toy. Sear the meat cubes in batches.
I would suggest searing just one side of each cube. Avoid overcooking the meat because it will defeat the purpose of cooking it sous-vide later and the entire purpose of this guide will be wasted.
Deglaze the pan if needed. Allow meat and pan juices to get to room temperature.

5. Sous-Vide everything.
Add the meat, the pan juices, the meat juices and the strained stock to a gallon baggie. Here’s where things could get a bit tricky because vacuum sealing liquids is not trivial. But if you don’t mind a bit of air in the baggie (and it shouldn’t really matter) you could extract the air using the displacement method which is nothing more than sticking the bag in the water and letting the air out as it sinks. Then go ahead and zip it up.
Make sure you’re working with good ziplock bags because this is a long cook and you don’t want any surprises. I use a chamber vacuum sealer which makes the job very easy and there is no air left in the baggie once done. Maybe consider getting one if you see yourself cooking sous vide frequently. Cook for 12 hours at 65C or 24 at 60C.
You can feel the meat cubes after the first 12 hours for tenderness. Top round is extremely tough so you should be able to tell if the cubes are getting more tender over time. Also, the cooking times may vary slightly from cow to cow.
6. Make the annatto oil.
Mix the annatto seeds and the 3 Tbsp of oil in a container with an airtight lid. Shake whenever you walk by it. The annatto will release more and more of its tinting potential as time goes by.
You can make this oil months in advance if you really want. But if you’re time-pressed, warm up the oil which will speed up the process significantly. Don’t cook the annatto though. It can burn pretty easily and that will just ruin everything by adding a terrible layer of bitterness to your hard work. Annatto is also known as achiote in Mexico and if you’re in Venezuela… we call it onoto. Onoto other things now.

7. Cook the carrots (Also Sous Vide!).
I didn’t cook them sous vide, in fact, the carrots didn’t even make it into the final plated dish I photographed for this article. Accidental omission, so sorry about that. It’s not like I left out the beef! Anyway, if you wanna go sous vide all the way, vacuum-seal the carrots with a pinch of salt and cook them at 80C for about 1 hour.

8. You’re ready for greatness.
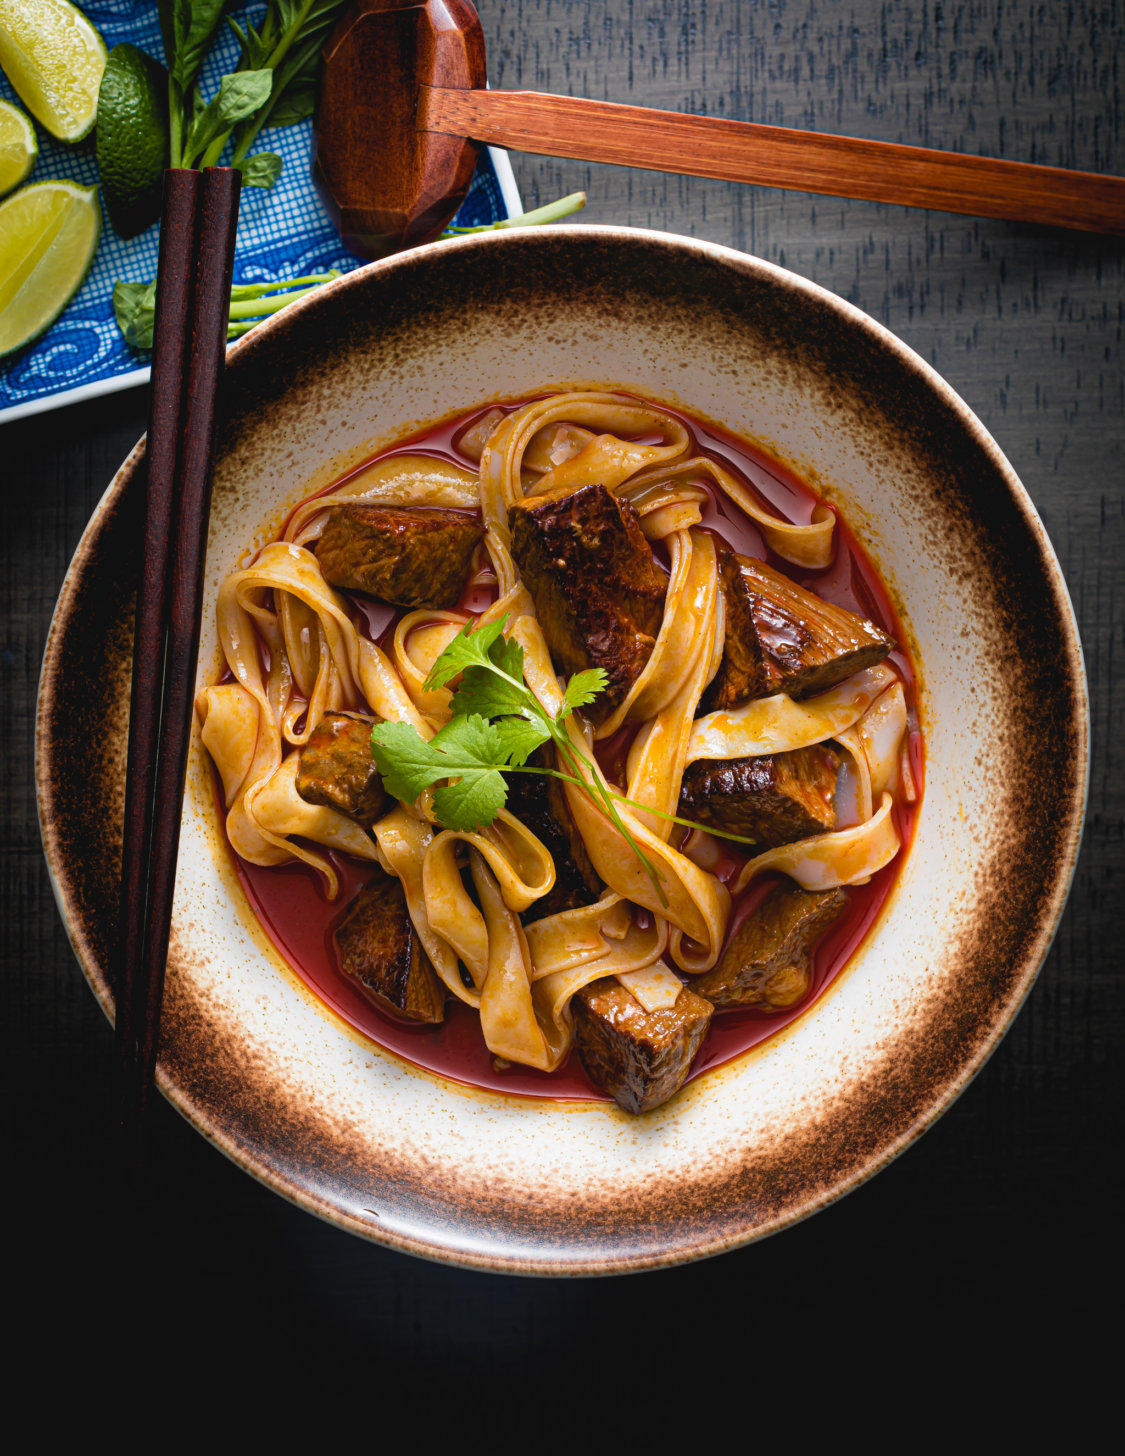
Open the baggies and pour the contents into a bowl before serving. There should be a fair amount of liquid which will be mostly water, collagen and of course all your flavorings. Collagen is the connective tissue in animal muscles and it will give body to the broth and make it silky in texture. There is no need to add any thickening agents to this. If everything has gone according to plan (which I really hope it has), the liquid should be syrupy and for lack of a better word… perfect.
Unlike me, serve the stew and garnish with those beautiful carrots I’m still regretting not having added not only elevating the entire dish but also providing a wonderful visual component to the pics.
Let’s not forget the annatto oil. This component contributes very delicately to the flavor of the dish. Subtle earthy and bitter notes will coat everything but trust me, so subtle is almost impossible to detect. To me, its vibrant color is far more important. Add about a Tbsp of annatto oil to each serving bowl. The result is absolutely beautiful.
On spare small plates have the lime wedges, cilantro, and the Thai basil ready to go. The rest is history, my friend. Enjoy this wonderful Vietnamese beef stew and please leave any comments, questions, food ideas, in the section below. Don’t forget to subscribe to my newsletter! If you’re looking at this article on your phone, the subscription page link is on the main menu. More content coming your way soon! Good night.

Wanna get more sous-vide cooking guides and cool cooking how-to’s in your mailbox? You know what needs to be done!
We never spam. You should only be getting updates when new content is posted on the site. We also respect your privacy. We don’t share your email address with anyone and you can unsubscribe anytime!


